
Homemade pita bread takes less time to make than conventional bread and is so versatile. Fill them with your favourite sandwich fixings, or cut them into wedges and dip them in your favourite dips. Use them as pizza crusts, or serve them as a side with a main dish.
2 1/4 tsp yeast
1/2 tbsp honey
1 cup warm water
1 1/2 cups all-purpose flour
1 1/2 cups whole wheat flour
1 tsp salt
1 tbsp olive oil
In a bowl or measuring cup, combine yeast, honey and water. Let stand for 5 minutes. In a large bowl, combine 1 cup all-purpose flour, all of the whole wheat flour and salt. Using a wooden spoon, add yeast mixture. Add as much of the remaining flour as necessary to form a soft dough that is sticky but not wet. Work olive oil into dough, then turn onto a lightly floured surface. Cover and let rest 10 minutes.
With floured hands, knead dough, adding additional flour as needed, until smooth and elastic (5-6 moinutes), then form into a ball. Coat a large bowl with cooking spray and place dough inside, turning it to coat with oil. Cover the bowl in a tea-towel and let stand in an oven with just the light on until dough has doubled in size (about 1 hour).
Lightly coat a baking sheet with cooking spray and set aside. Punch down dough and turn out onto floured surface. Divide dough into 6 pieces. Flatten each piece with the palm of your hand. Roll into a 4-5″ circle with a floured rolling pin. Place circles onto baking sheet about an inch apart.
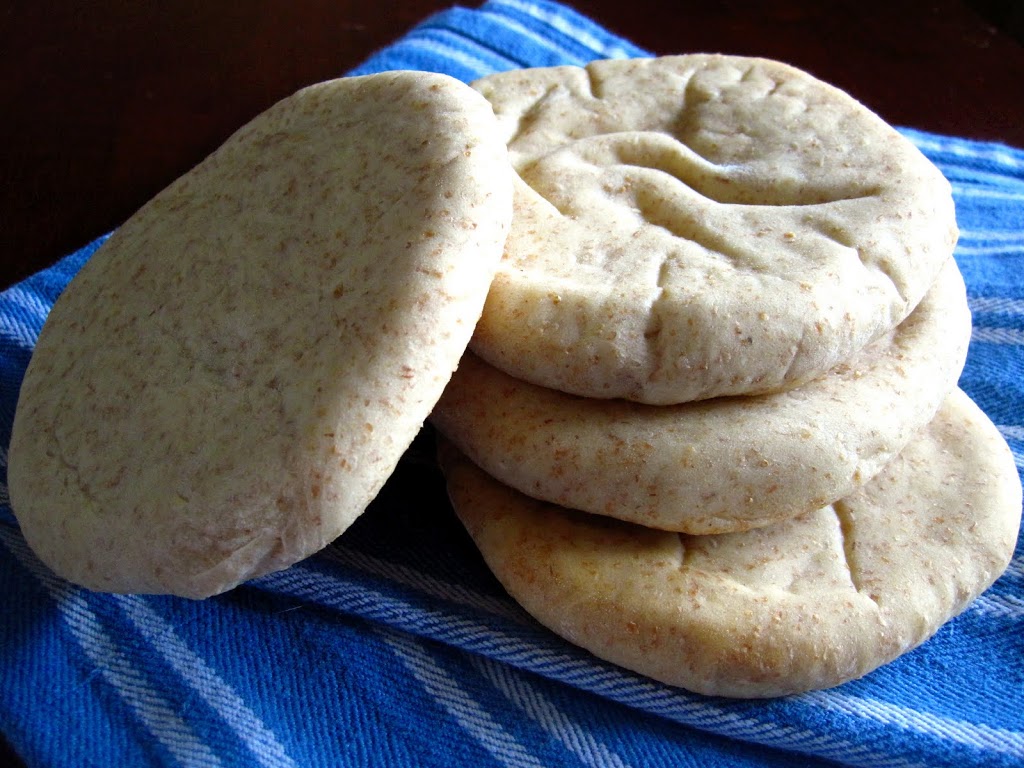
Bake in preheated 450F oven until lightly browned, about 5-7 minutes. (For a softer pita, bake at 375F.) Stack hot pitas on a tea-towel and wrap them up until cool. This makes a soft pita with pockets for filling.
This pita bread was a lot like the kind you get in Greek restaurants. I like having them warmed, brushed with olive oil, and dipped in hummus or tzatziki. They’re also yummy filled with chicken or egg salad, or even with plain old peanut-butter and jelly. I made my pitas pretty thick because I like them that way, but some of them didn’t have very good pockets because of the thickness of the bread. I had to cut pockets into a few of them so I could get my fillings in there. So if you want really good pockets in your pita, make sure to roll them out fairly thin. They’re very yummy though, whatever thickness they are. Even Cole enjoyed these and asked for more. They freeze well too, so you can double the recipe and save some for later.

I gave up on cooking with whole wheat flour and yeast a long time ago, but looking at your recipe and your pictures, I will have another try. In my kitchen, they have always been enemies, but obviously not in yours. That motivates me!!!
LikeLike
Hello! I made your pitas this weekend and they were so good! I was hoping you would give me permission to post the recipe on my blog? I will link it back to you and give you credit. You can email me ashleyterpstra@yahoo.com or just leave a comment on my blog. Thanks!!!PS Your fabulous blog is on my favorite blog roll, hope you check out my blog.
LikeLike